

After starting up with flutter and coding in Vanilla Flutter for most of my projects I finally reached the point where calling setState(), couldn’t just cut it anymore, handling multiple classes with so much dynamic data caused some of my projects to slowly become ugly and bulky, plus it takes a toll on the performance of your app cause you keep rebuilding the widget tree from top to bottom for just the slightest changes in values of variables.
What is State Management.
Have a look at this: https://flutter.dev/docs/development/data-and-backend/state-mgmt/simple. Remember the Flutter boilerplate code for a new project. Remember how when it wants to change the value of a variable in the code it does setState;
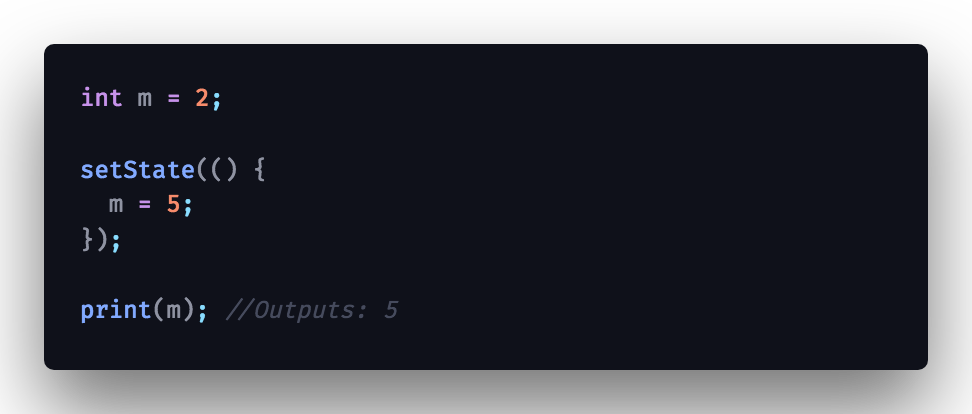 SetState in Vanilla Dart
What is MobX:
MobX is a tested library that makes state management simple and scalable by transparently applying principles of Functional Reactive Programming (TFRP).
Testing out MobX Flutter:
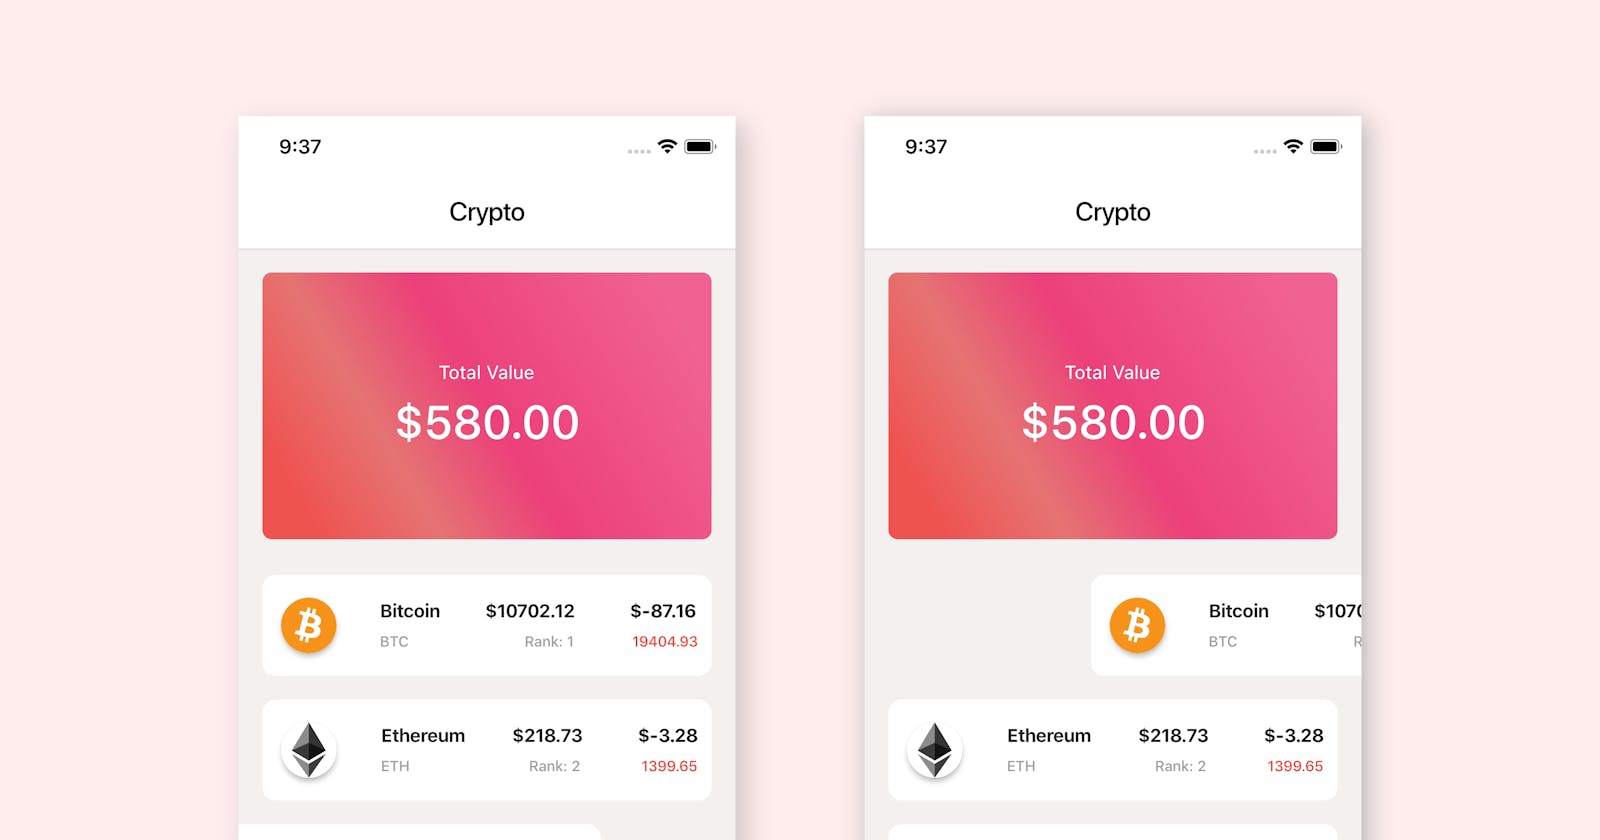
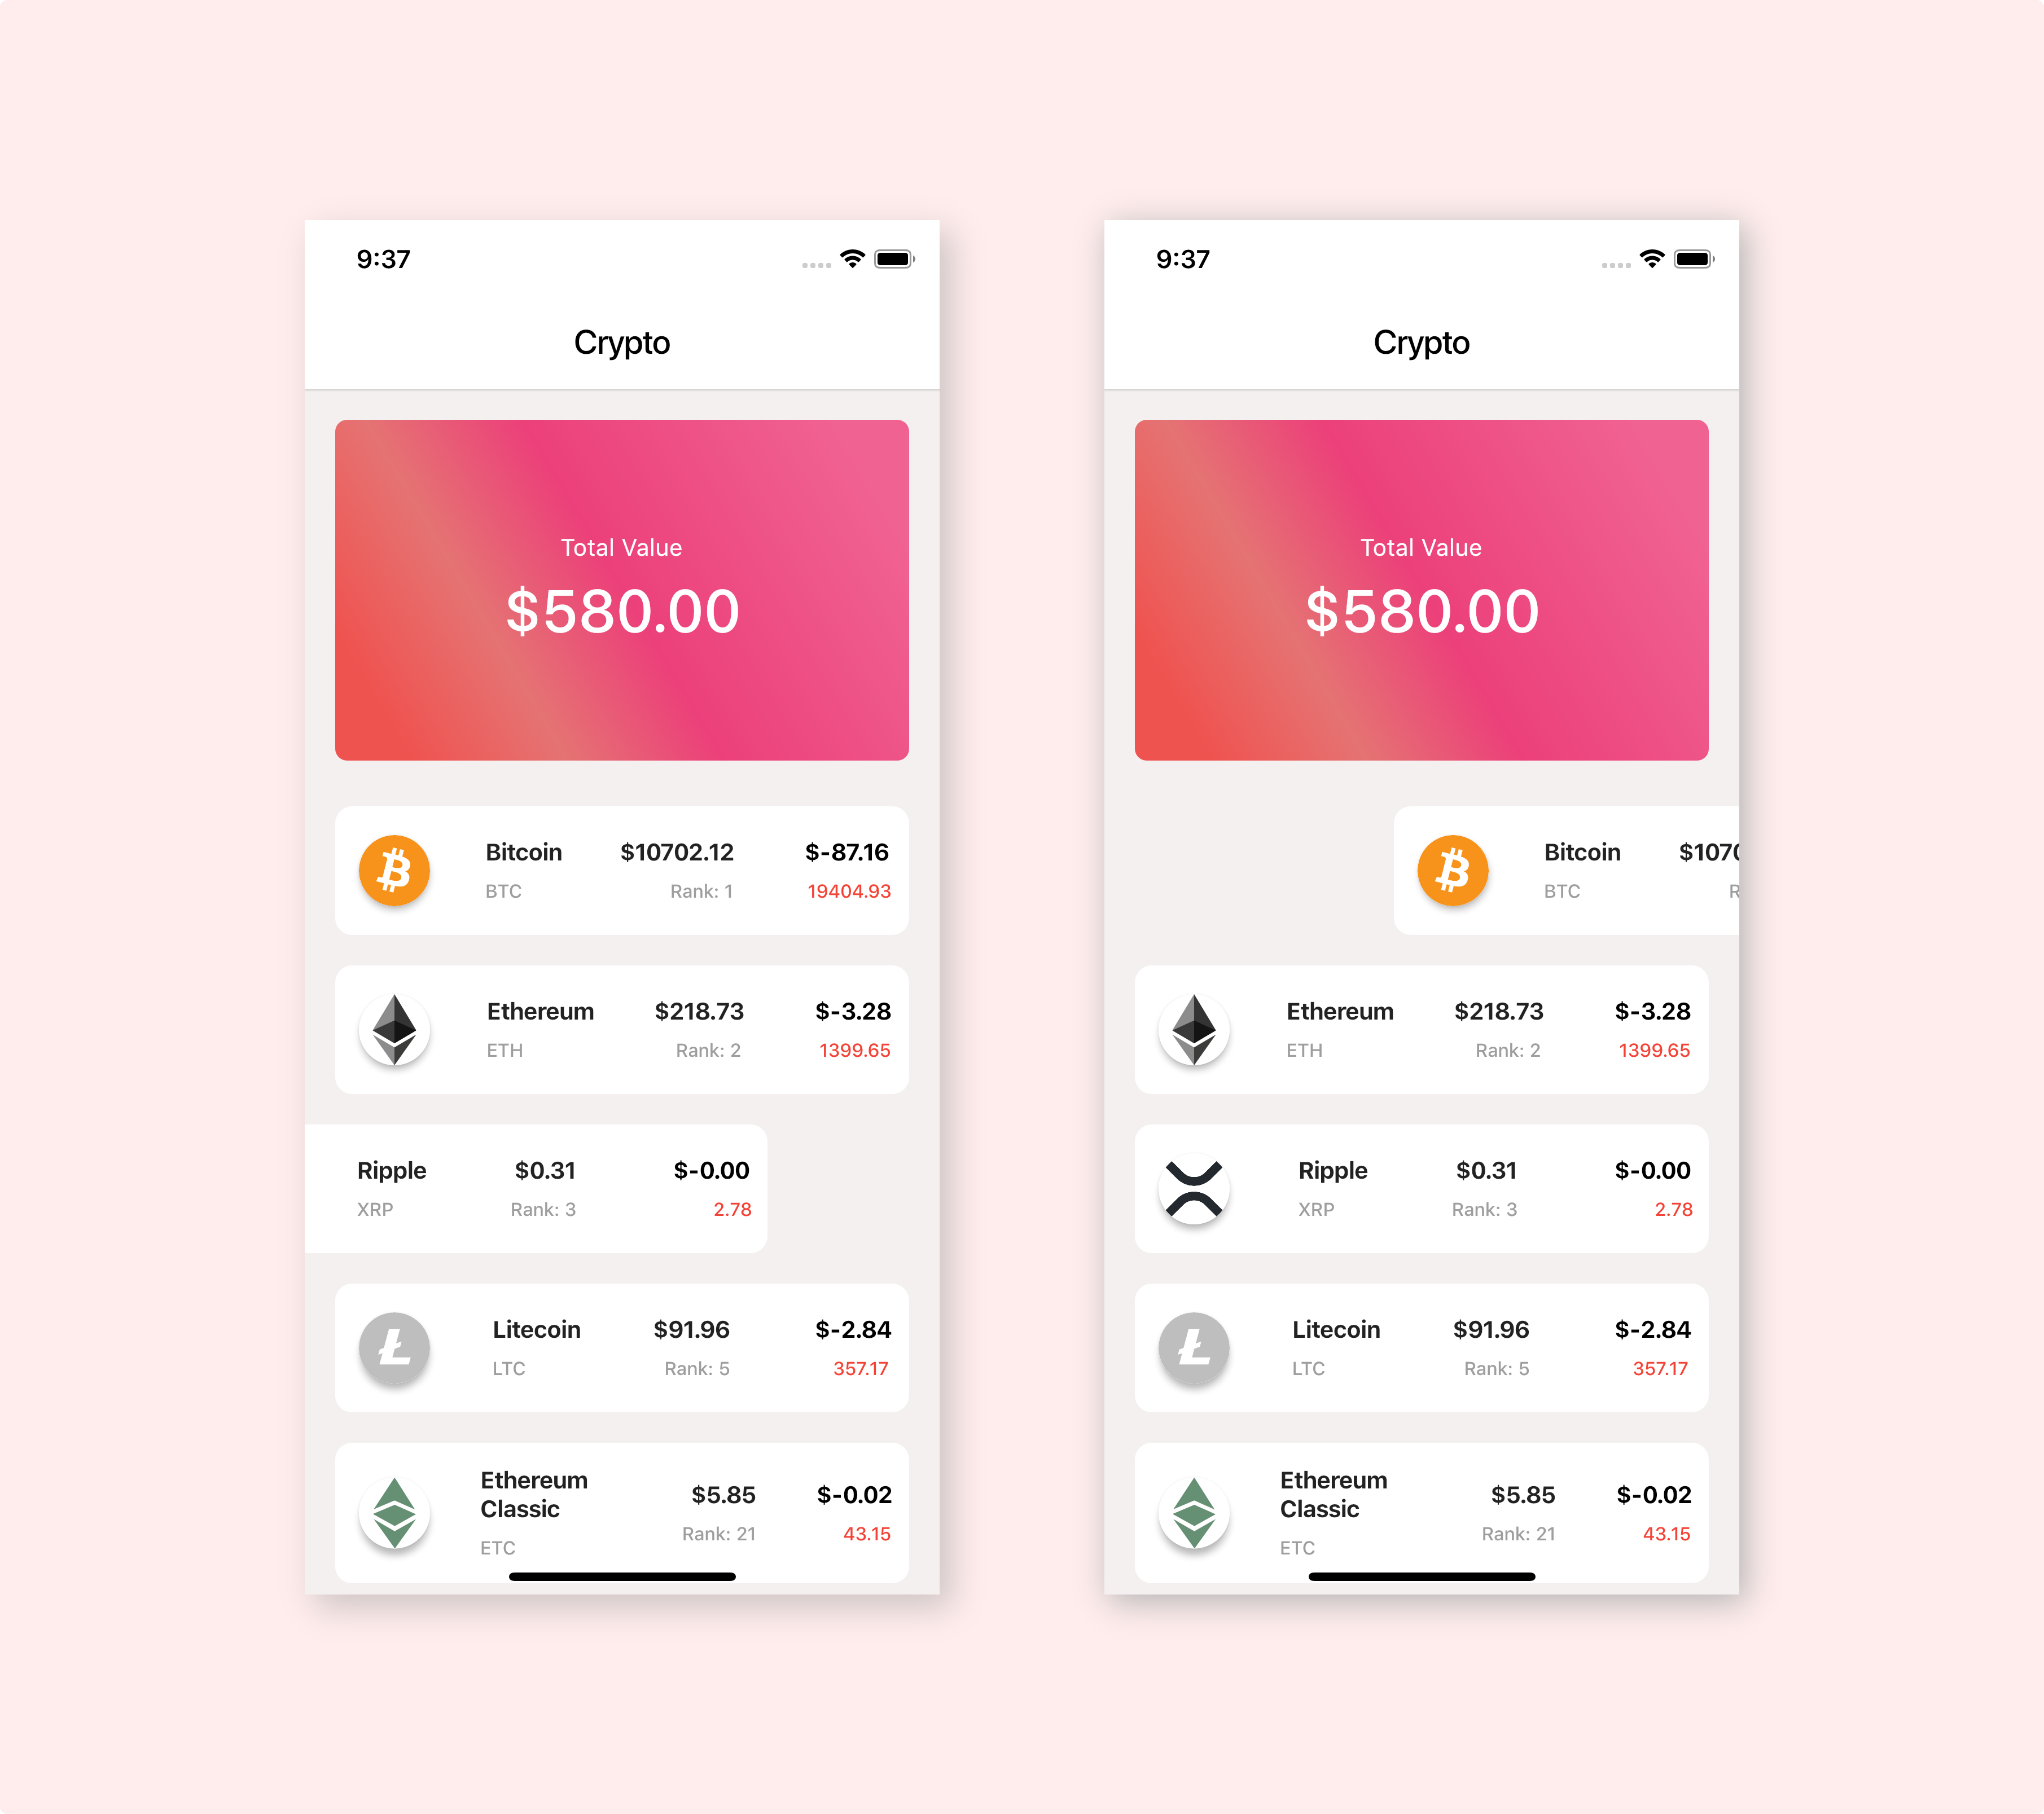 Crypto App with MobX
So I decided to build a sample app to show how easy building with MobX can be, you can also clone the project here.
Project Structure:
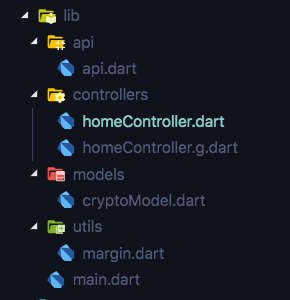 Project Structure
Arranging your project structure is very important and i take my time to do this on project creation even though it may change as you go on with your project it makes code refactoring, bug🐞 hunting faster and makes for cleaner easy to understand code. #Note *.g.dart are auto generated code by the build_runner package and should not be tampered with, except you’re a Flutter Sensei.
 LOL
LOL
Setting up Dependencies:
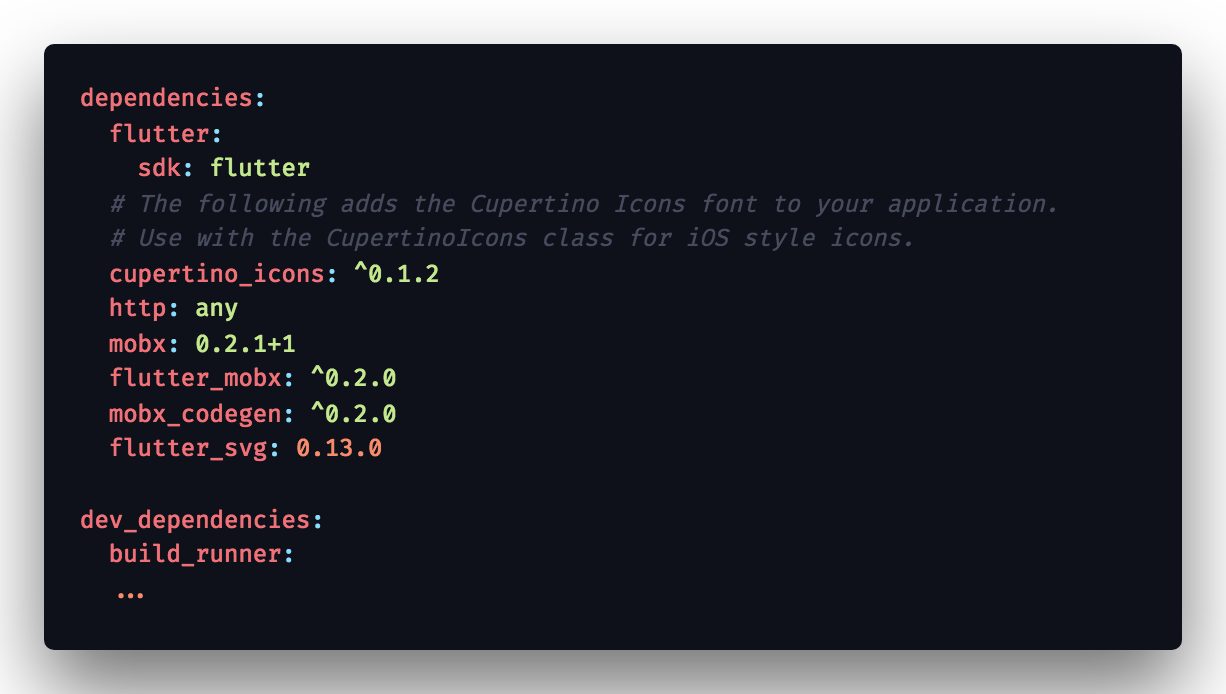 pubspec.yaml
flutter_mobx is the major plugin here and mobx_codegen and build_runner are for code generation. **Spoliers: MobX supports Code Generation.
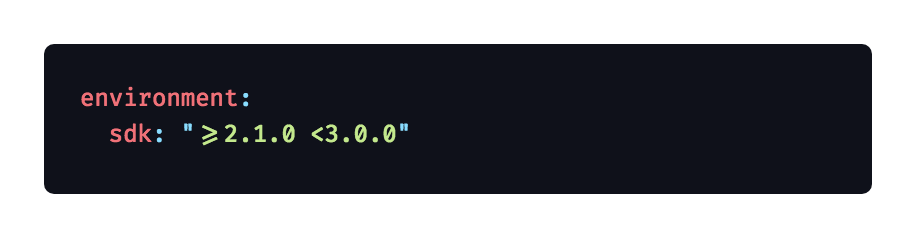
Heres my current Dart Version:
Custom Margin Widgets :
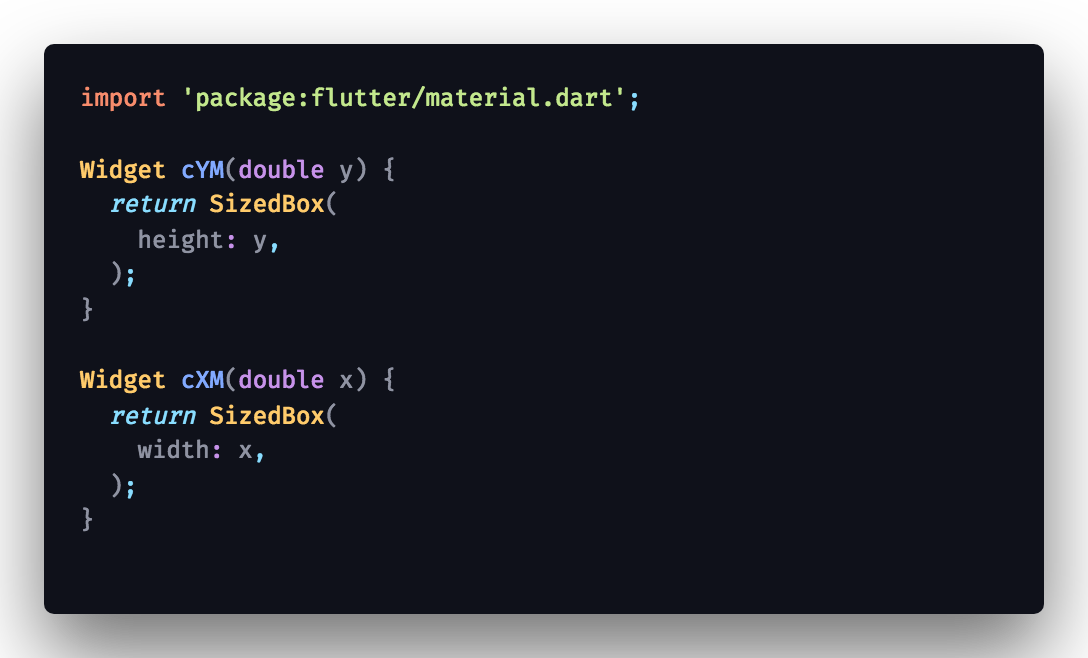
You might notice the reference to the method cYM() and cXM(). Okay you caught me, so when I was learning Flutter I needed a way to easily add spacing to my mobile app. I know, I know there is the Spacer() widget for that purpose but it wasn’t still flexible enough for me, plus its a huge time saver. So I created them cYM for Custom Y Margin (adding Vertical Spacing), and Custom X Margin (adding Horizontal Spacing).
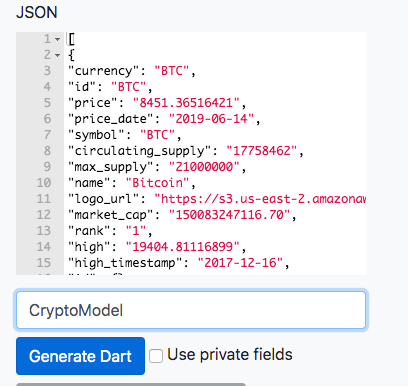
Setting Up API and Model Classes:
So we would be using Nomics Cryptocurrency & Bitcoin API: http://docs.nomics.com/
So there we have the sample JSON Response given for the GET: /currencies/ticker endpoint. Also wed use an online tool to generate A Model Class from the JSON given. There’s an alternative json_serializer library from flutter too.
Here’s the tool: https://javiercbk.github.io/json_to_dart/
 Problem with caveats would occur
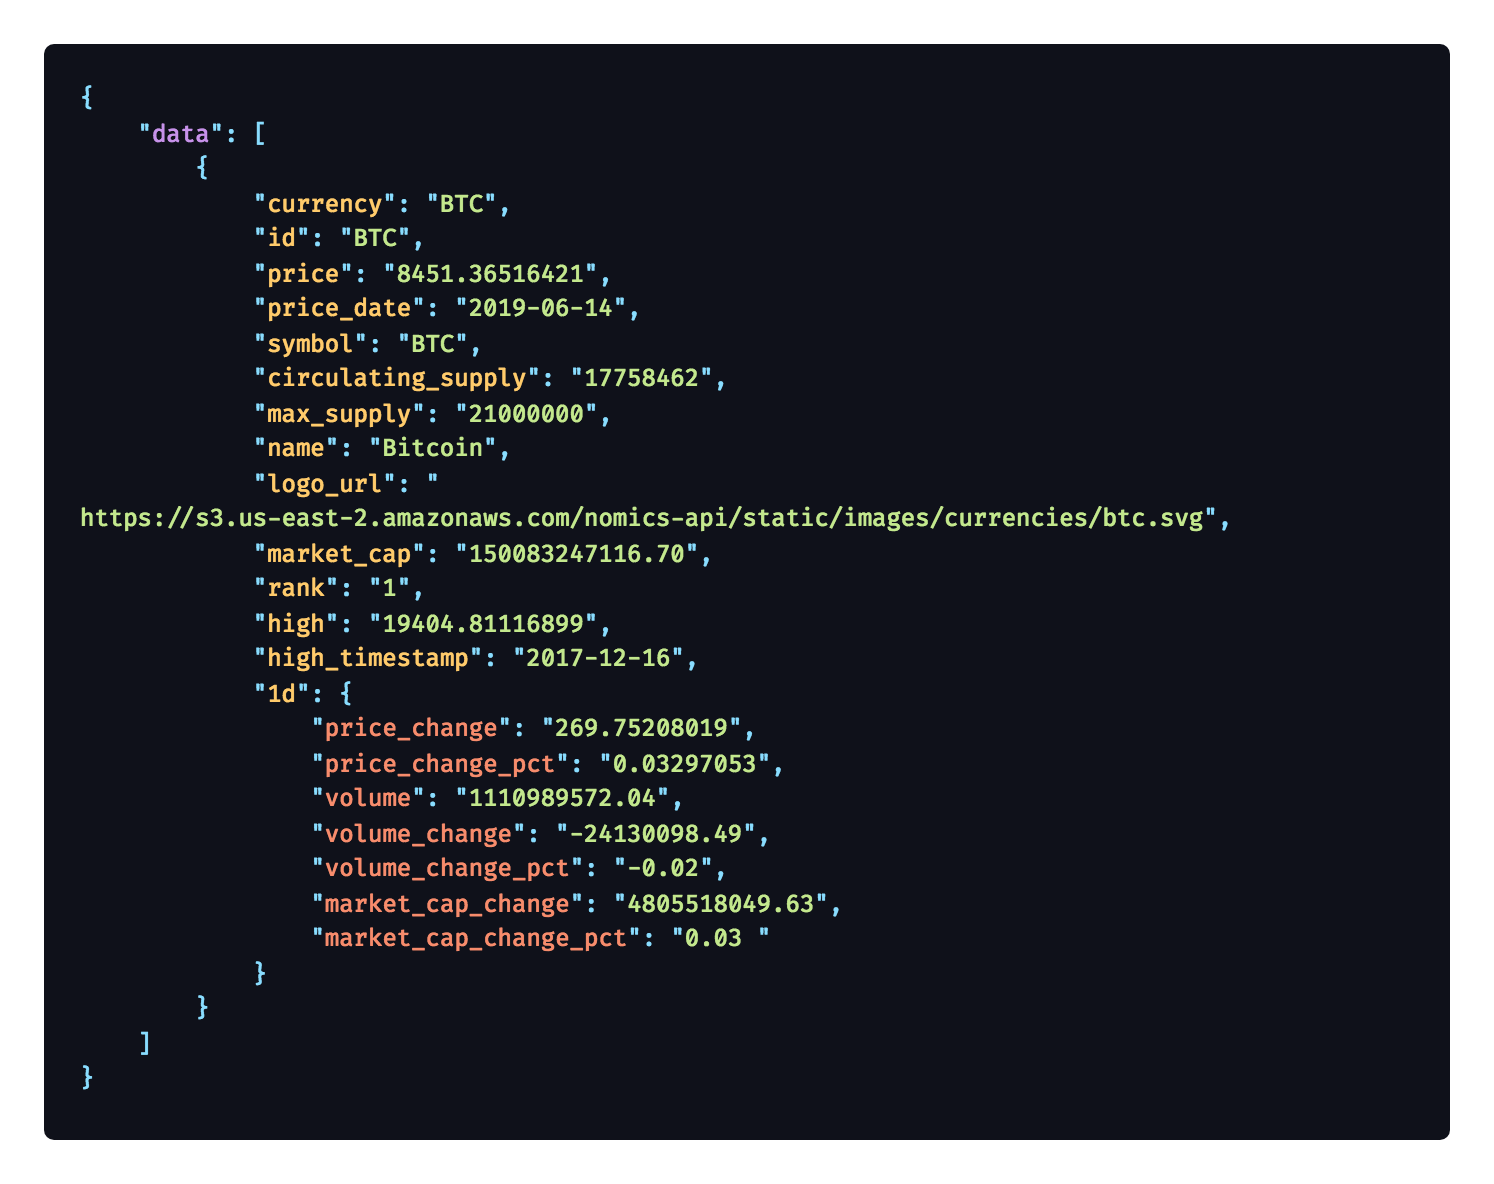
Normally JSON TO Dart Tools works well but when working with JSON Arrays it get trick there. The hack to this is just basically wrapping it with a new Object;
That is transforming :
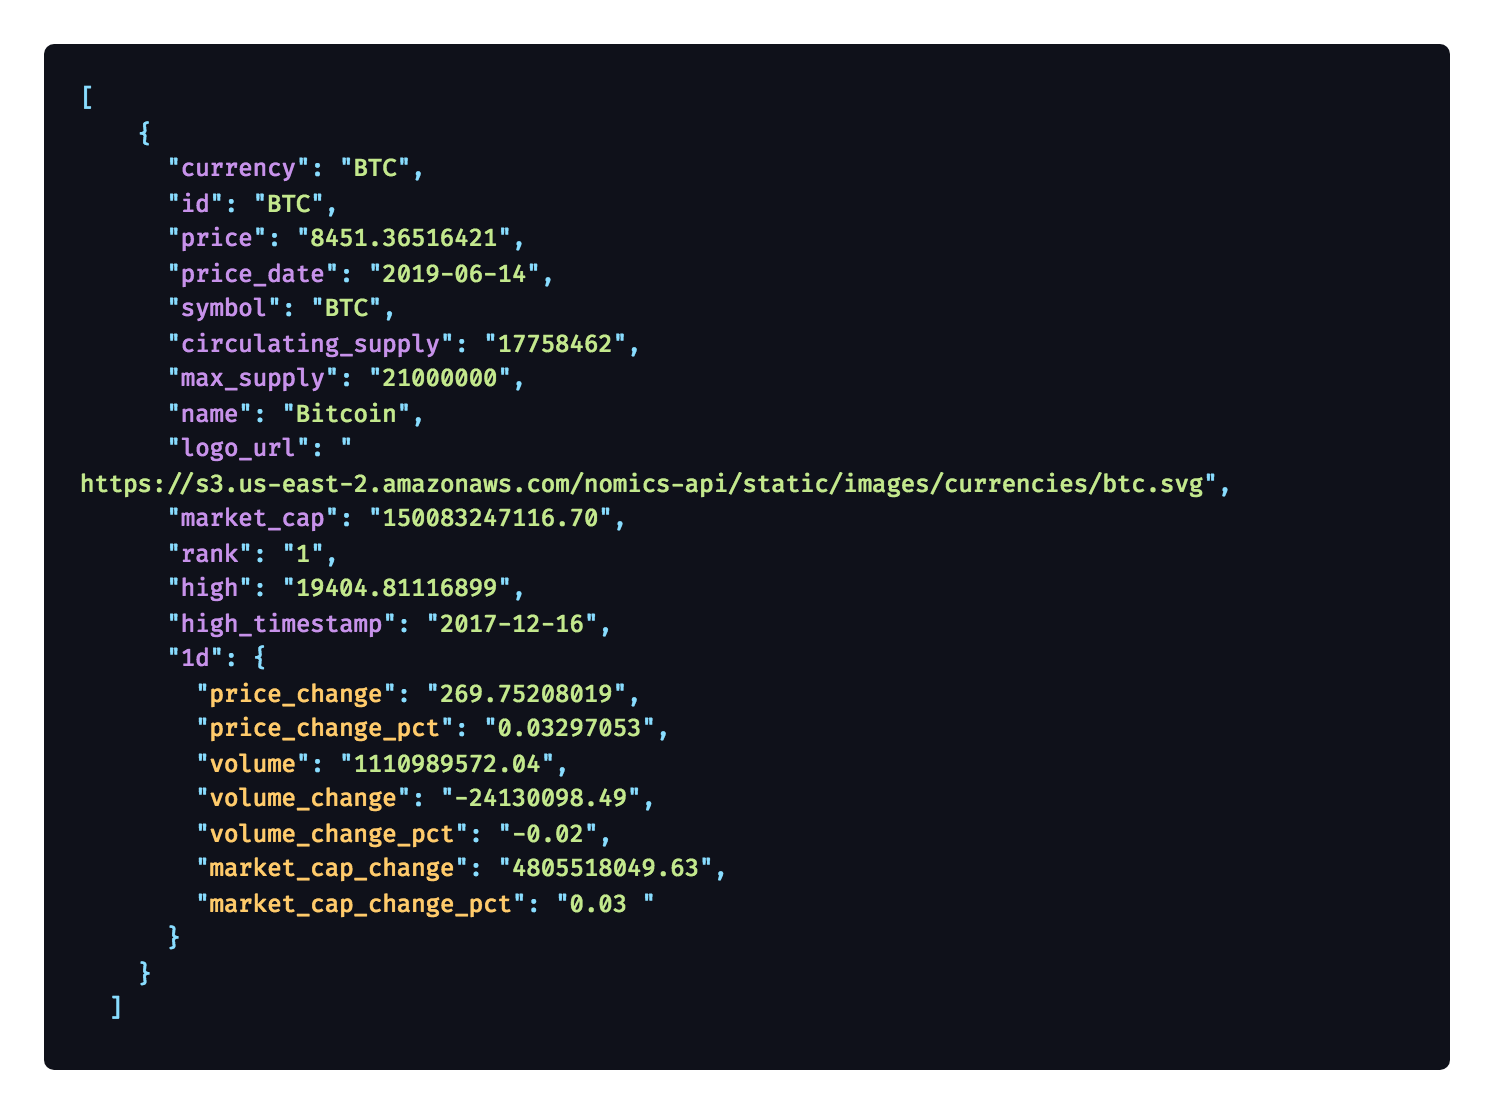
To:
If you have any issues and I did cause the tool didn’t parse the JSON properly still. Check out My own Model Class:
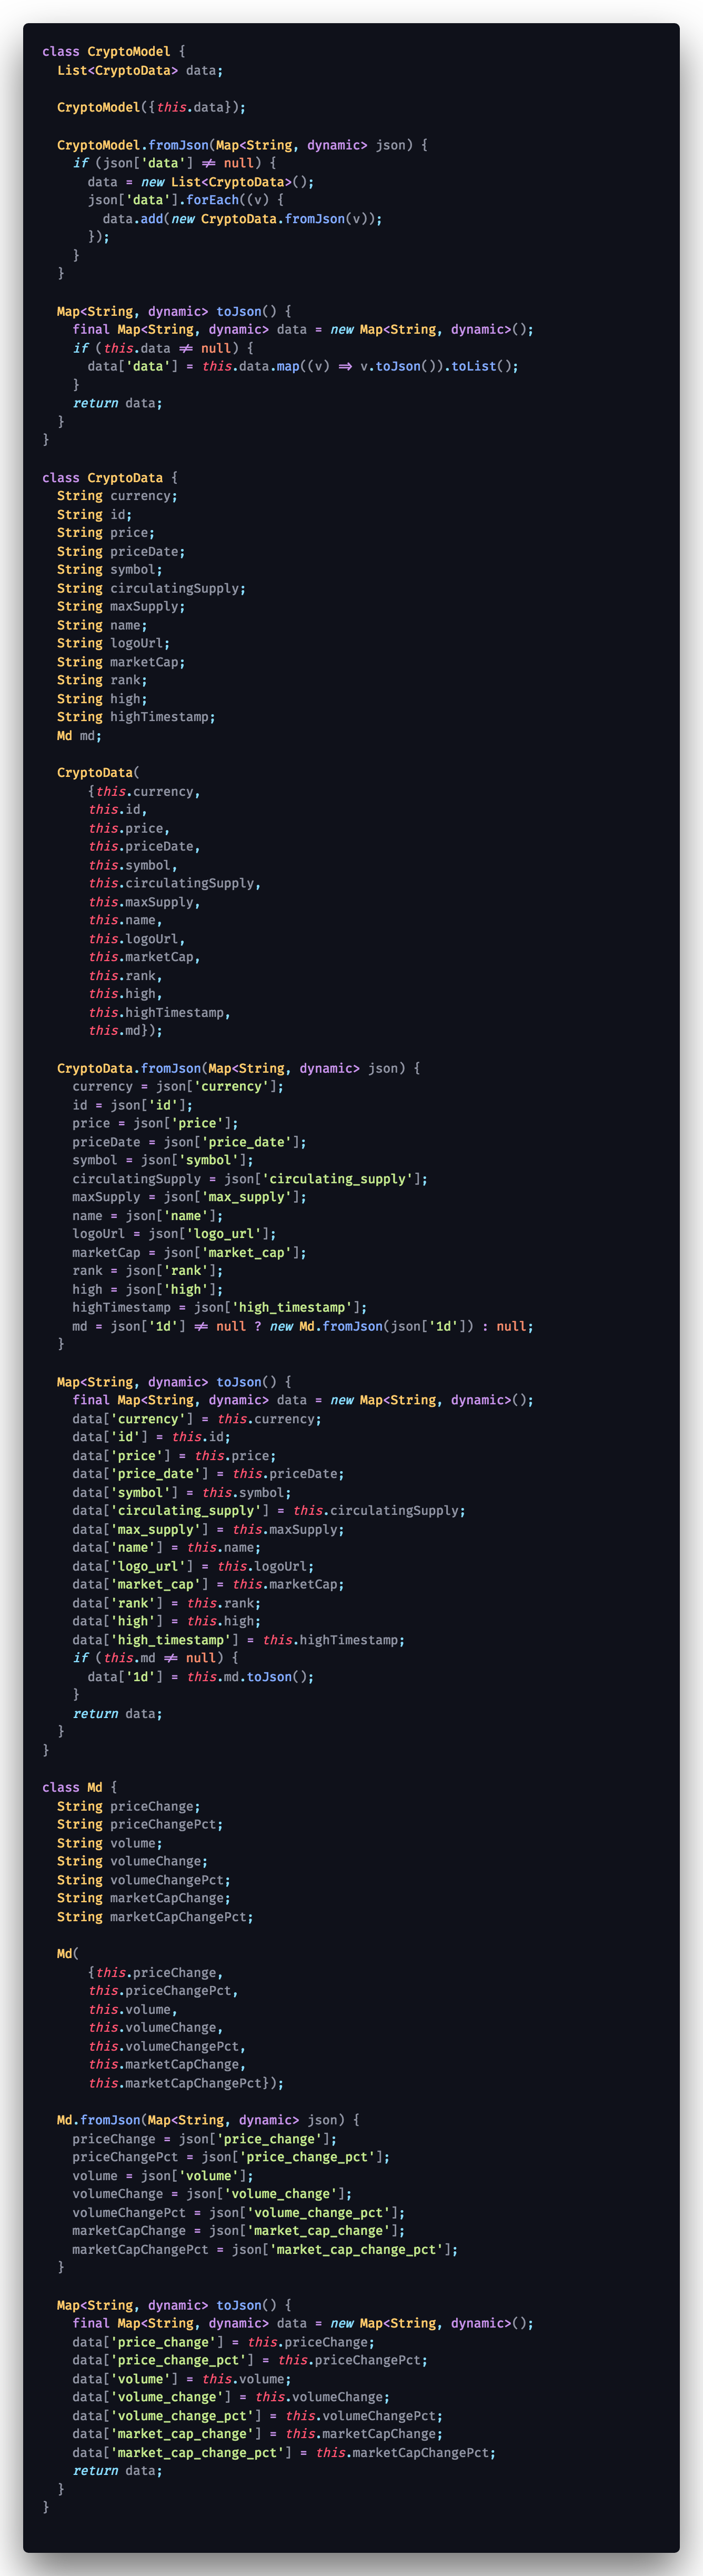
It’s also hosted on Github so you could check it there also.
Building Controller Class:
Here is where the magic happens: You create a new class
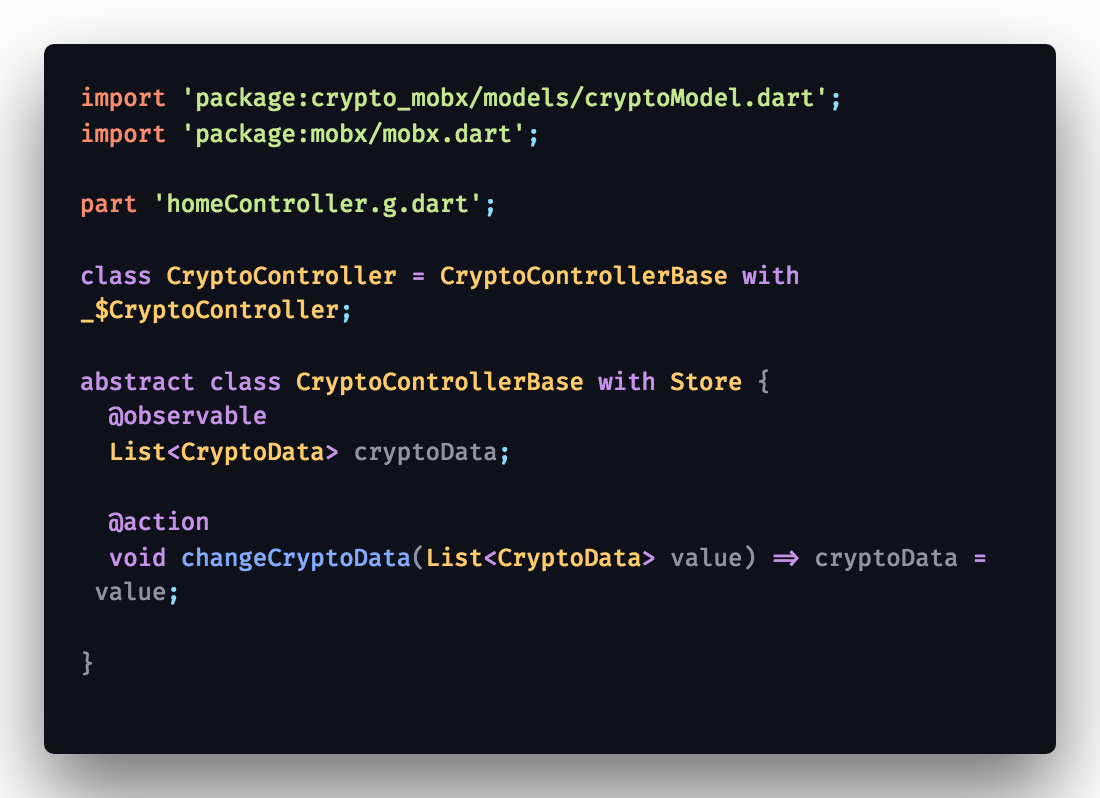
Following the docs of MobX: I was able to follow the docs to create a Controller that mobxcodegen would use to generate the $CryptoController class.
The part 'homeController.g.dart; specifies the class that would be created by build_runner .
part and part of is used more and more for code generation scenarios recently (instead of deprecated transformers)
Check out MobX Flutter Docs: https://pub.dev/packages/mobx
Build Runner:
Command to run build runner is as follows:

Building API Request Handler:
Just the way I like it:
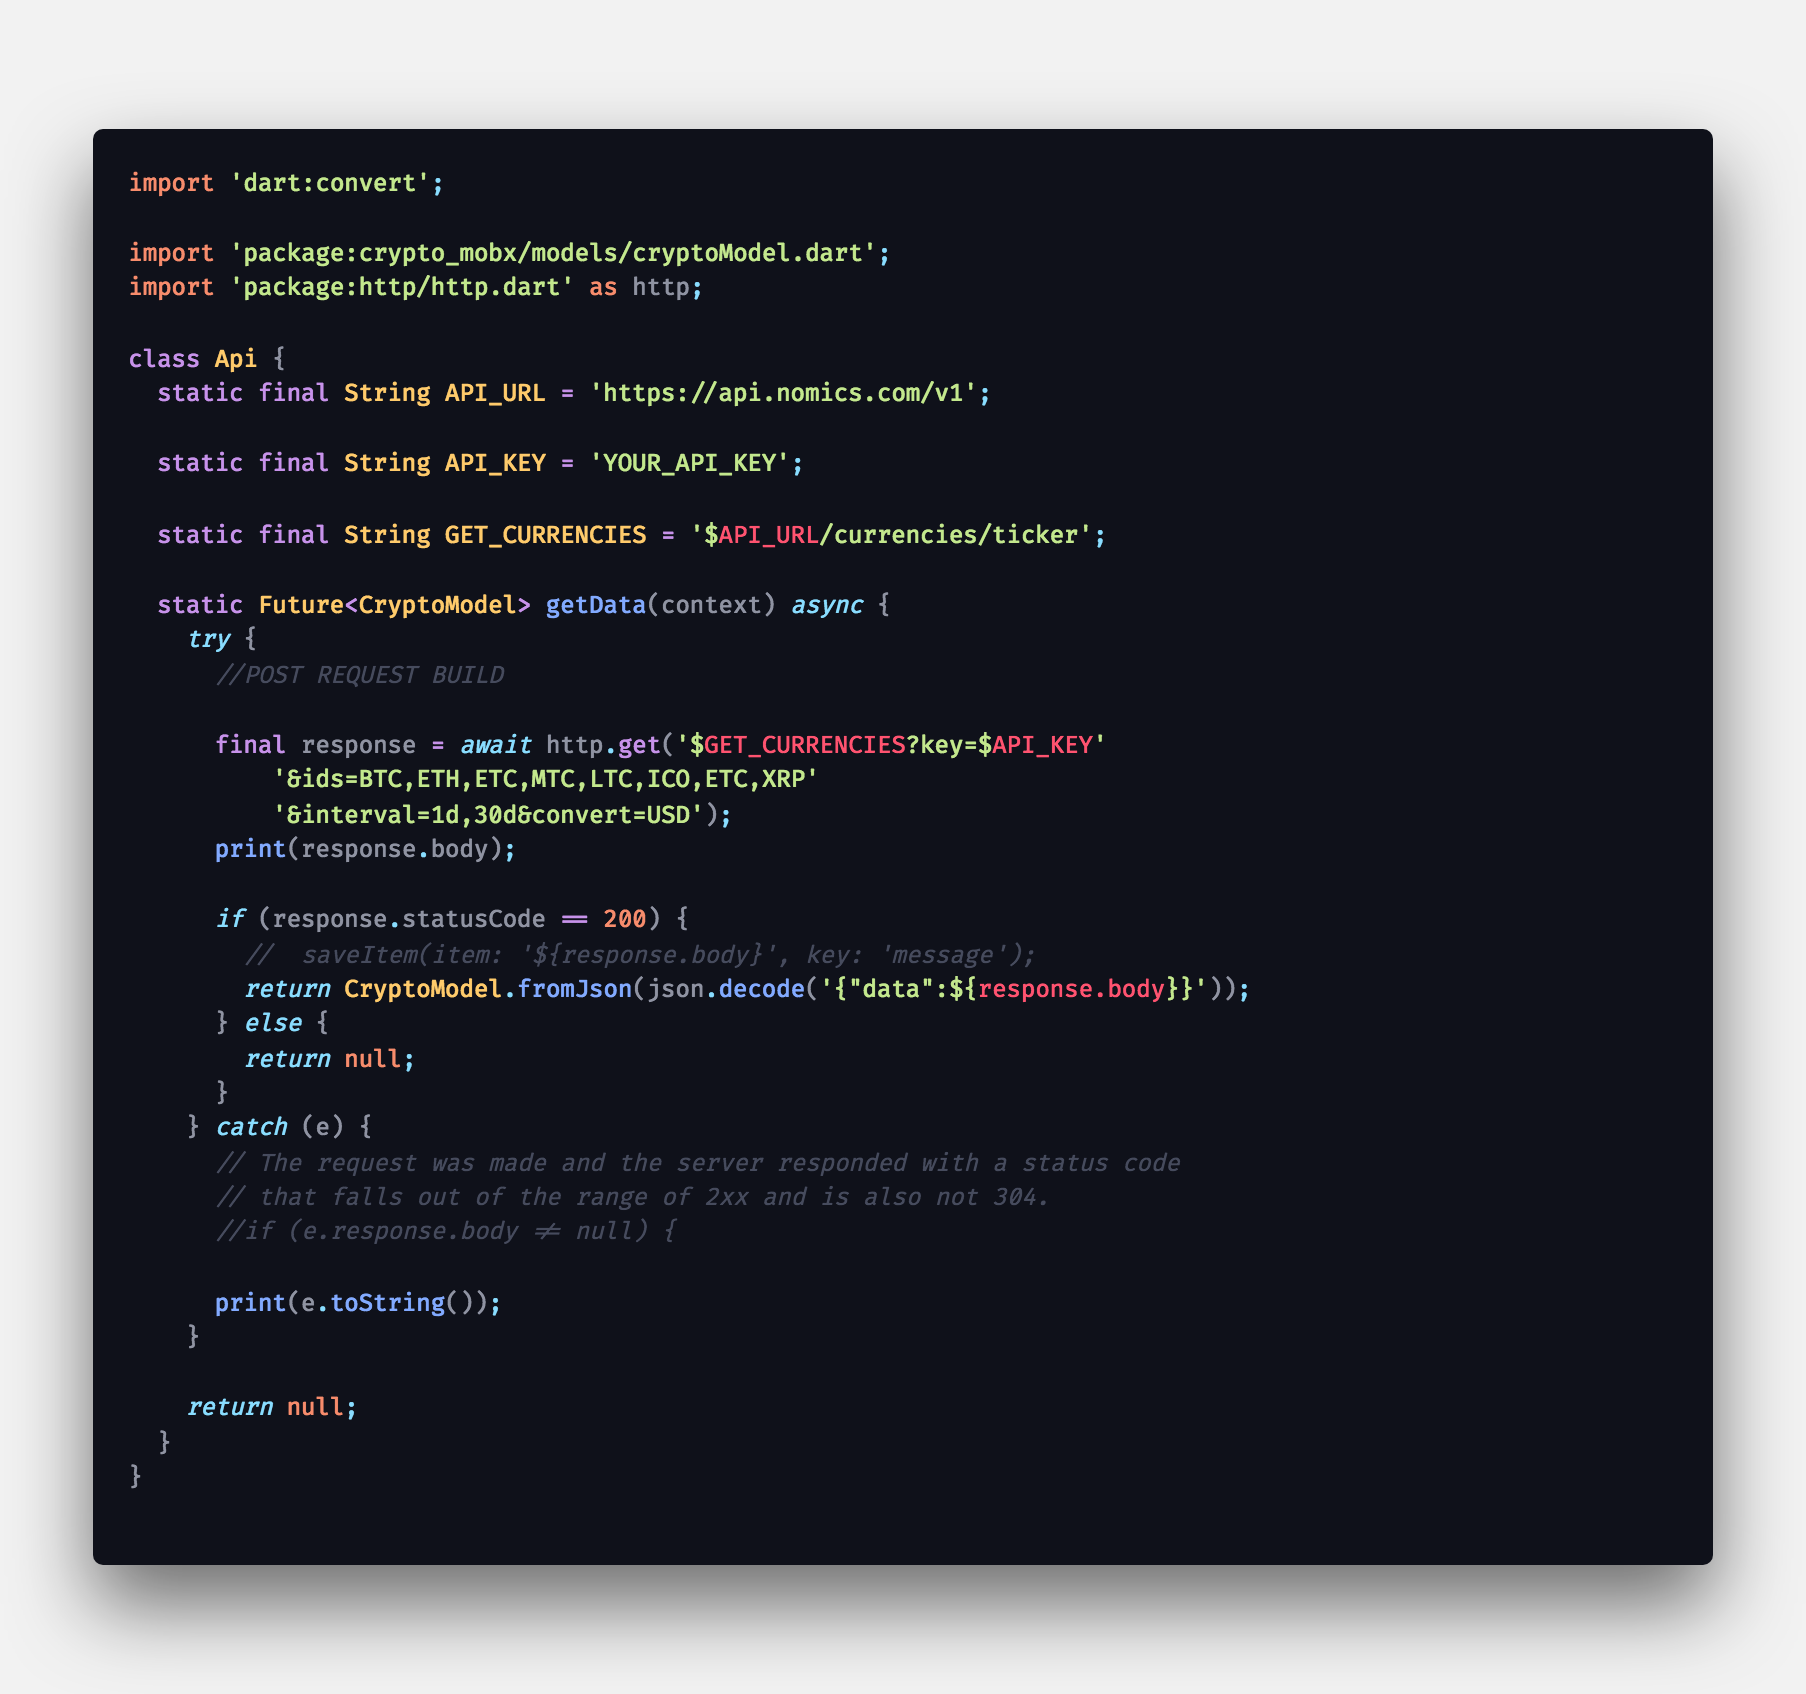
Creating a custom class that returns the data Model as a future:
 The HACK in action!!
Remember the hack i told you about: Look how i wrapped the response inside a JSON Object.
Building Home Page:
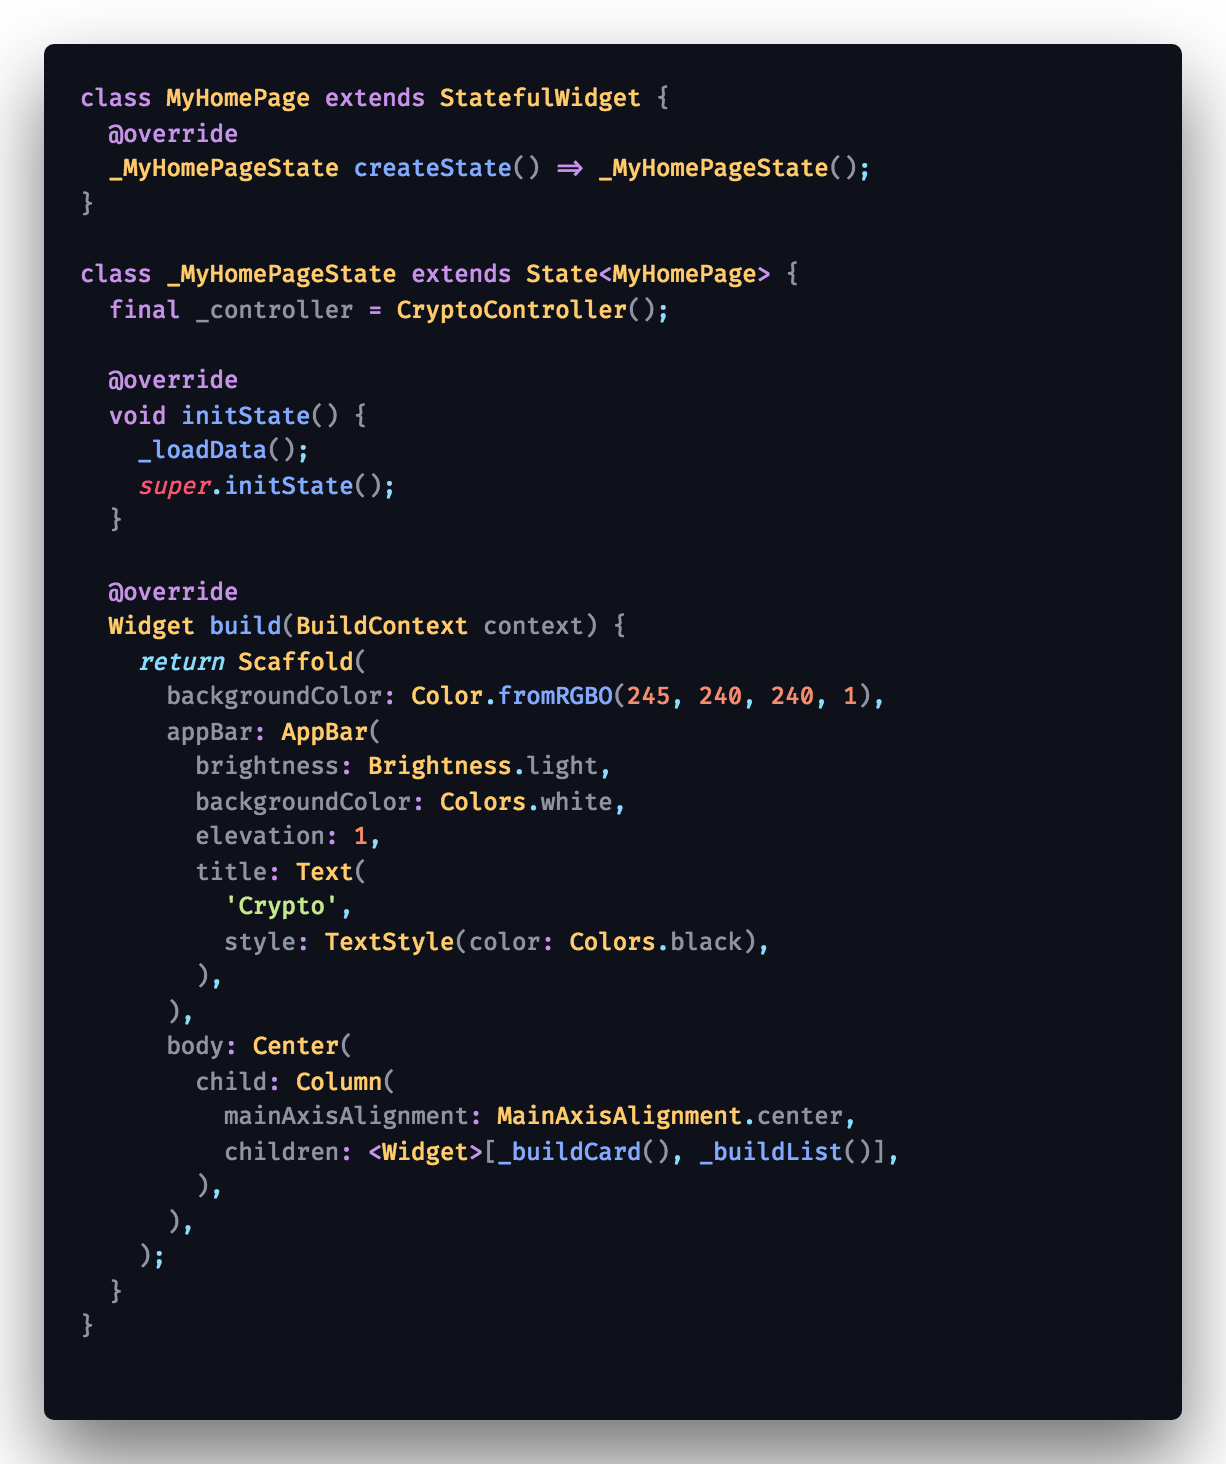
First I build my UI which is made up of two major parts: A Card and then a List below it.
Also take note to instantiate the mobx controller:
 Import MobX State Controller Class
For the Card:
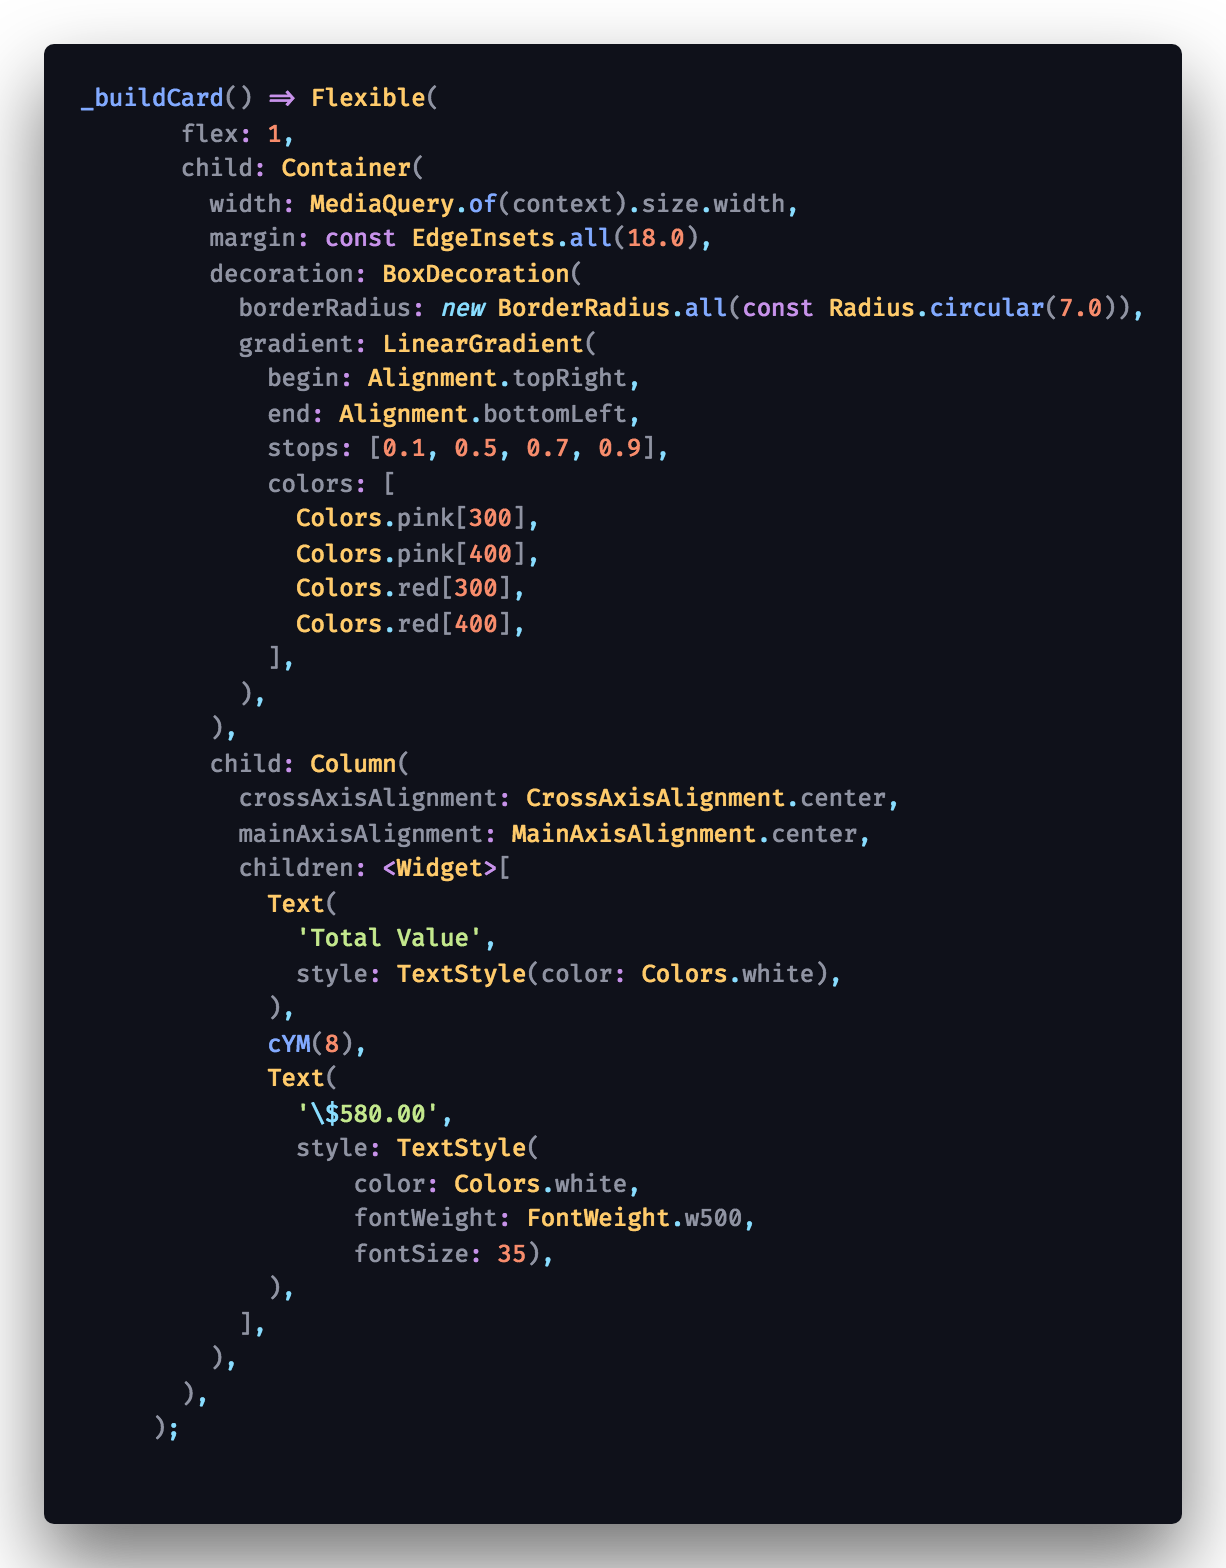 Simple Card with a Gradient Background
For the ListView:
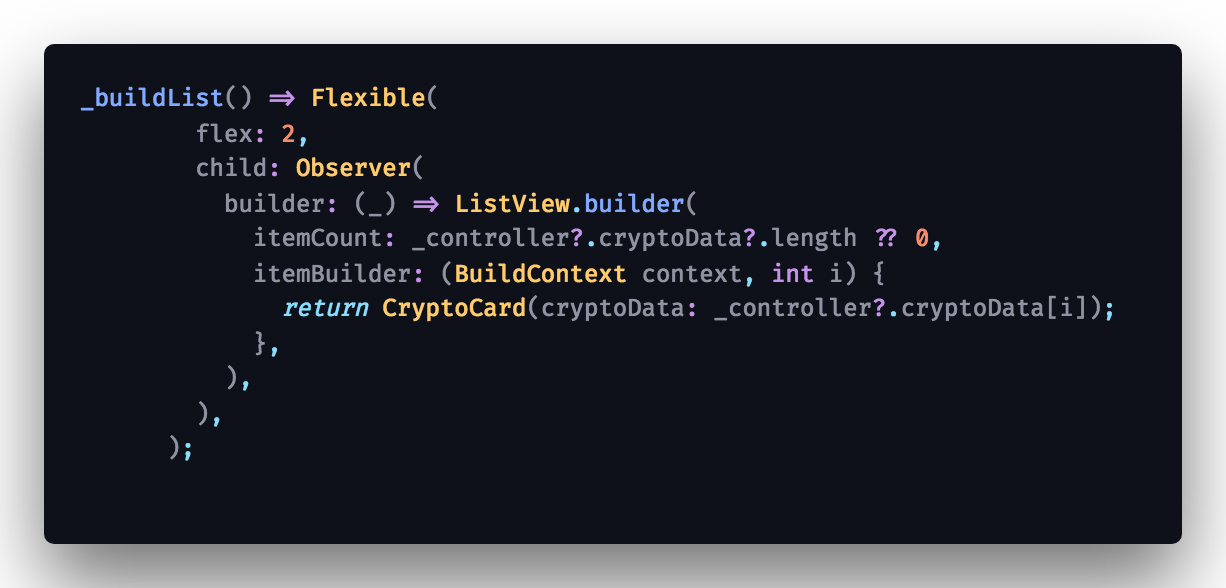 ListView
Something i picked up a few months back is null safety in flutter. It can be a pain but to be on the safe side always set default values or fall back values especially with dynamic data: So you’d notice the _controller?.cryptoData?.length ?? 0 , basically i’m checking for null values and at the end if there are it should return the length of the array to be. All with the help of the ?? operator which would return the value if it is not null else it returns a default value.
Observer Widget:
Without this being implemented our actions would be in vain. So here’s how it works: Instead of rebuilding the widget tree from top to bottom, the Observer widget cause only the widgets it is wrapped around to be rebuilt. In this case the only value that would need to observe is _controller.cryptoData .
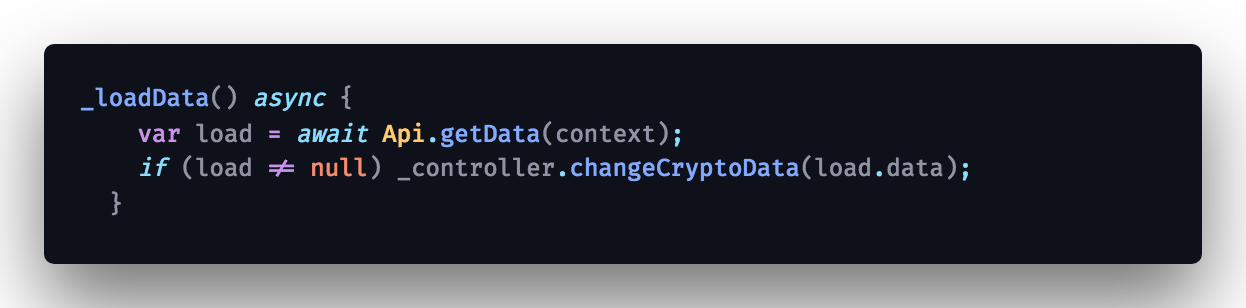
SetState is Dead:
All we need to do is
 WHAT THE !!!!!
Lastly for the CryptoCard Widget:
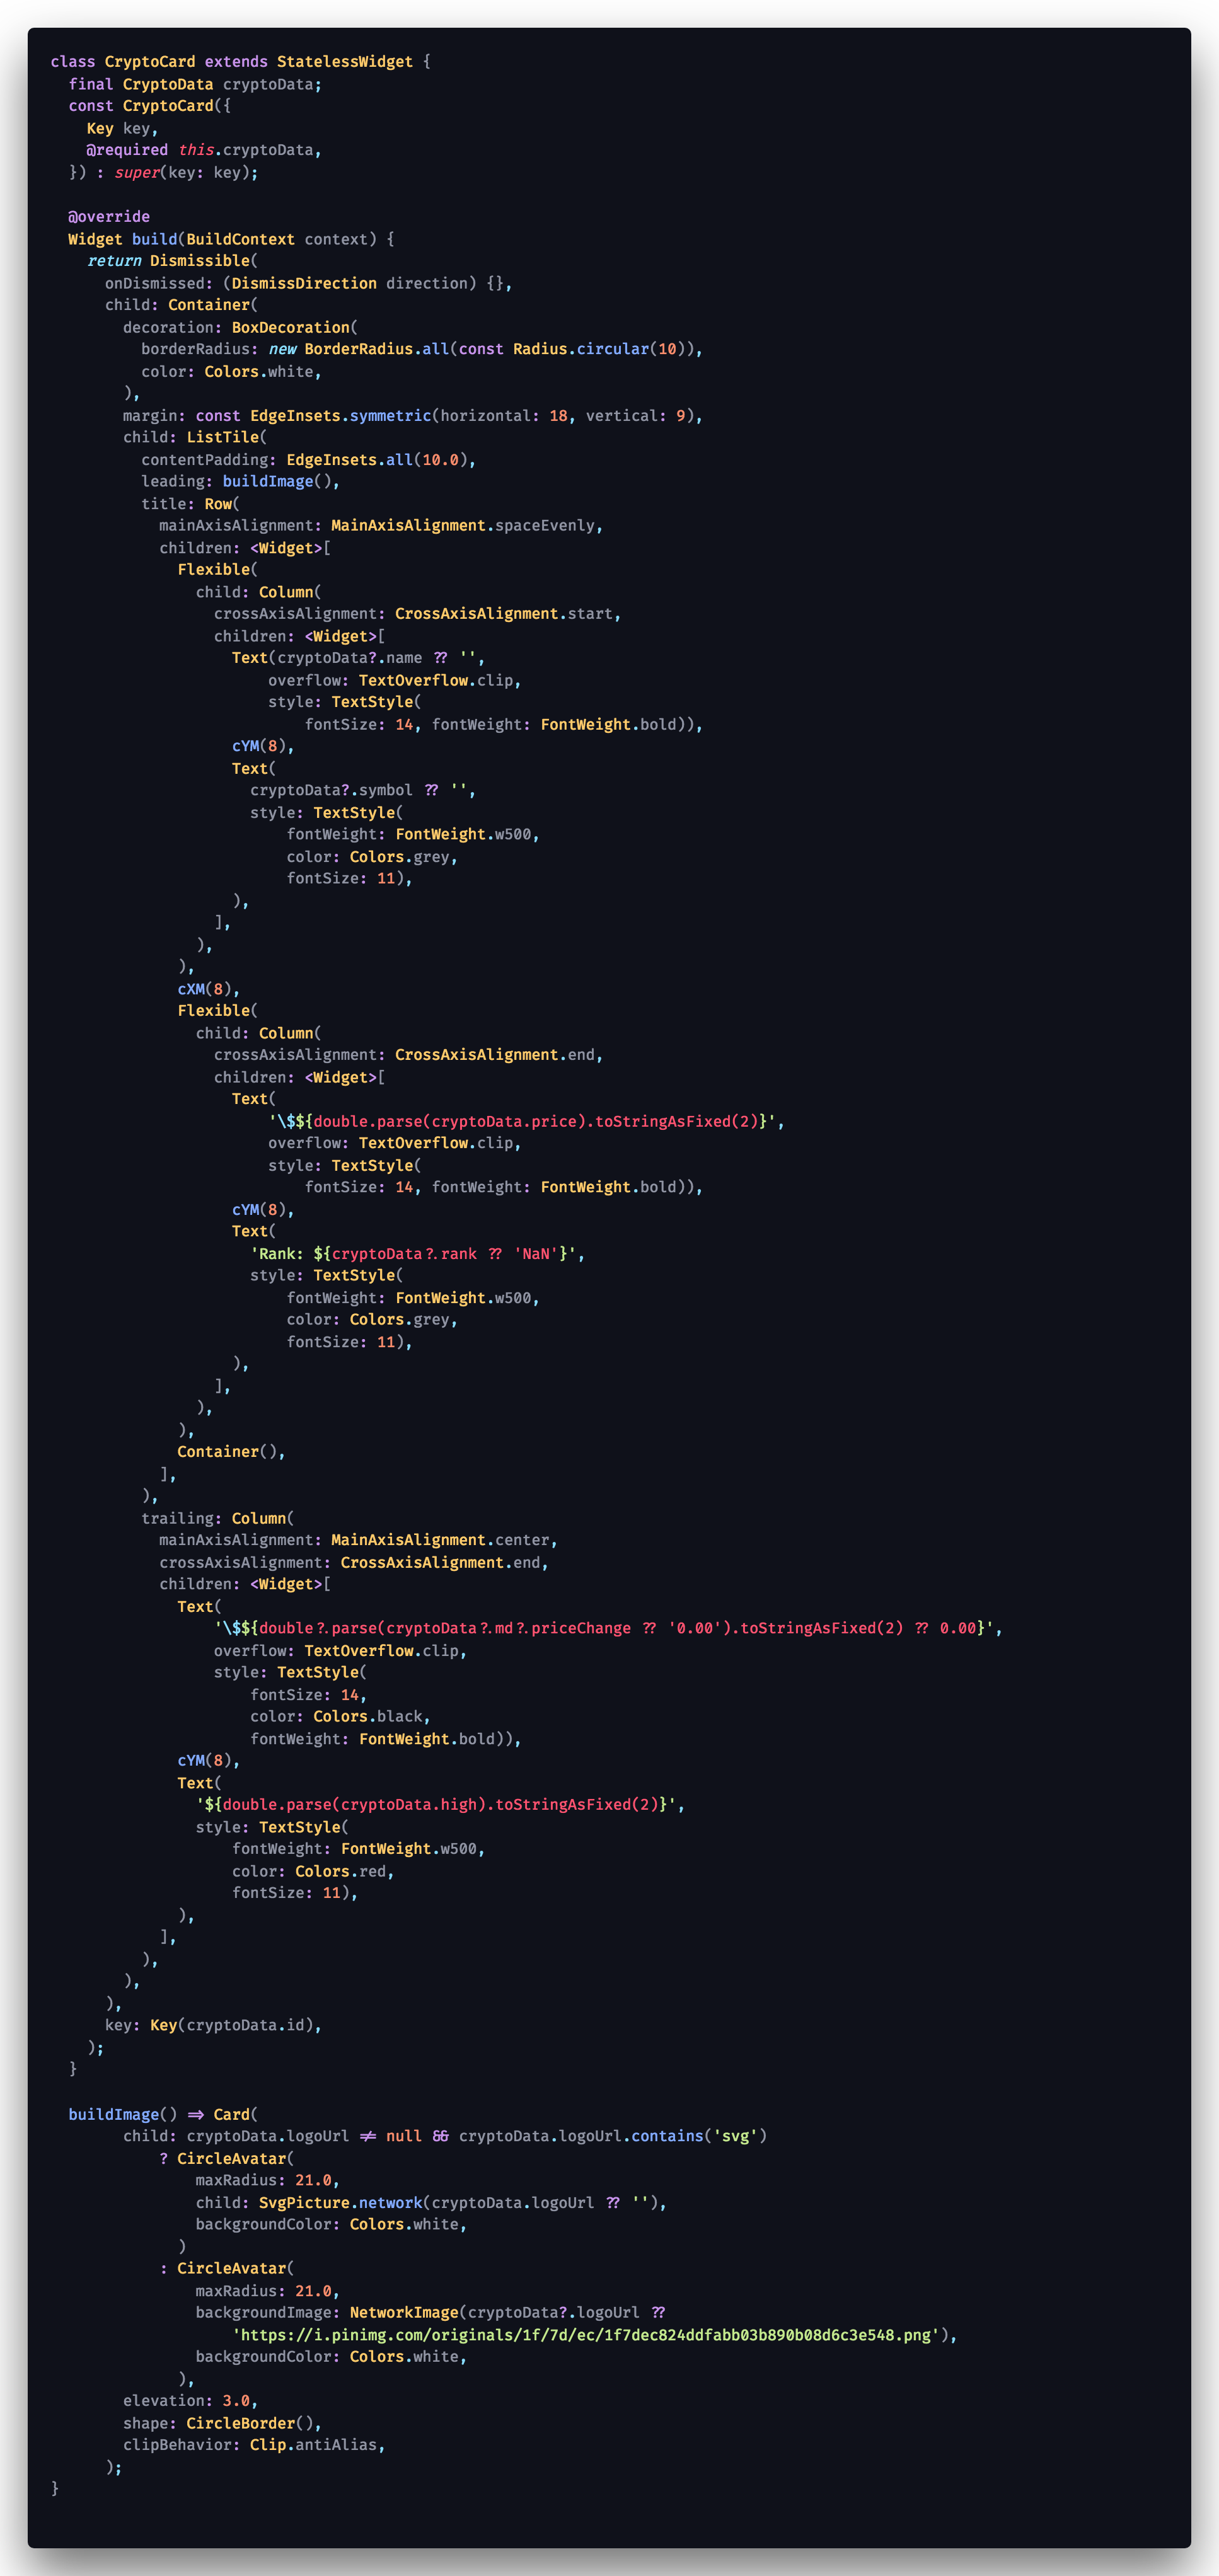
Notice the Dismissible Widget it is wrapped in, all it needed was a unique Key which i set as the ID of that particular ListItem returned by the API. And also the image was random so i had to check if it was svg or png/jpg, using a ternary operator ( condition ? return : else return) so as to return SvgPicture.network() or NetworkImage() Widget respectively.
Also .toStringAsFixed() method helps to round a double to specified decimal places.
So Finally:
I’d like to add: State Management with MobX is awesome 🤩
 We have this Beauty…🤩🤩🤩
Till next time, thanks for reading…
 Jikai made, yonde kurete arigatō…